Table of Contents
1. Introduction
2. Creating items in bulk using file import
3. Creating items in bulk using grid
4. Creating items in bulk with UOM
4.1 Alternate unit of measure
4.2 UOM Flexibility in purchase orders
5. Creating bundle items
5.1 To add items to a bundle
6. Creating items in bulk with variants
6.1 To create Variants
6.2 To create items with Variants
7. Category-Based Ledger Mapping for Bulk Item Creation
7.1 Mapping Ledger Accounts for Item Categories
8. Bulk Item Creation: Edit Mode
1. Introduction
The Bulk Item Creation screen is used for creating Items in bulk for the company or organization needing to add items in large quantities.
To create Items in Bulk
Go to Inventory>> Bulk Item Creation>> Create New
Enter Item Details
In this form, we can create the Items in bulk either by adding the details in the Add Item grid or import the items by using the sample sheet given.
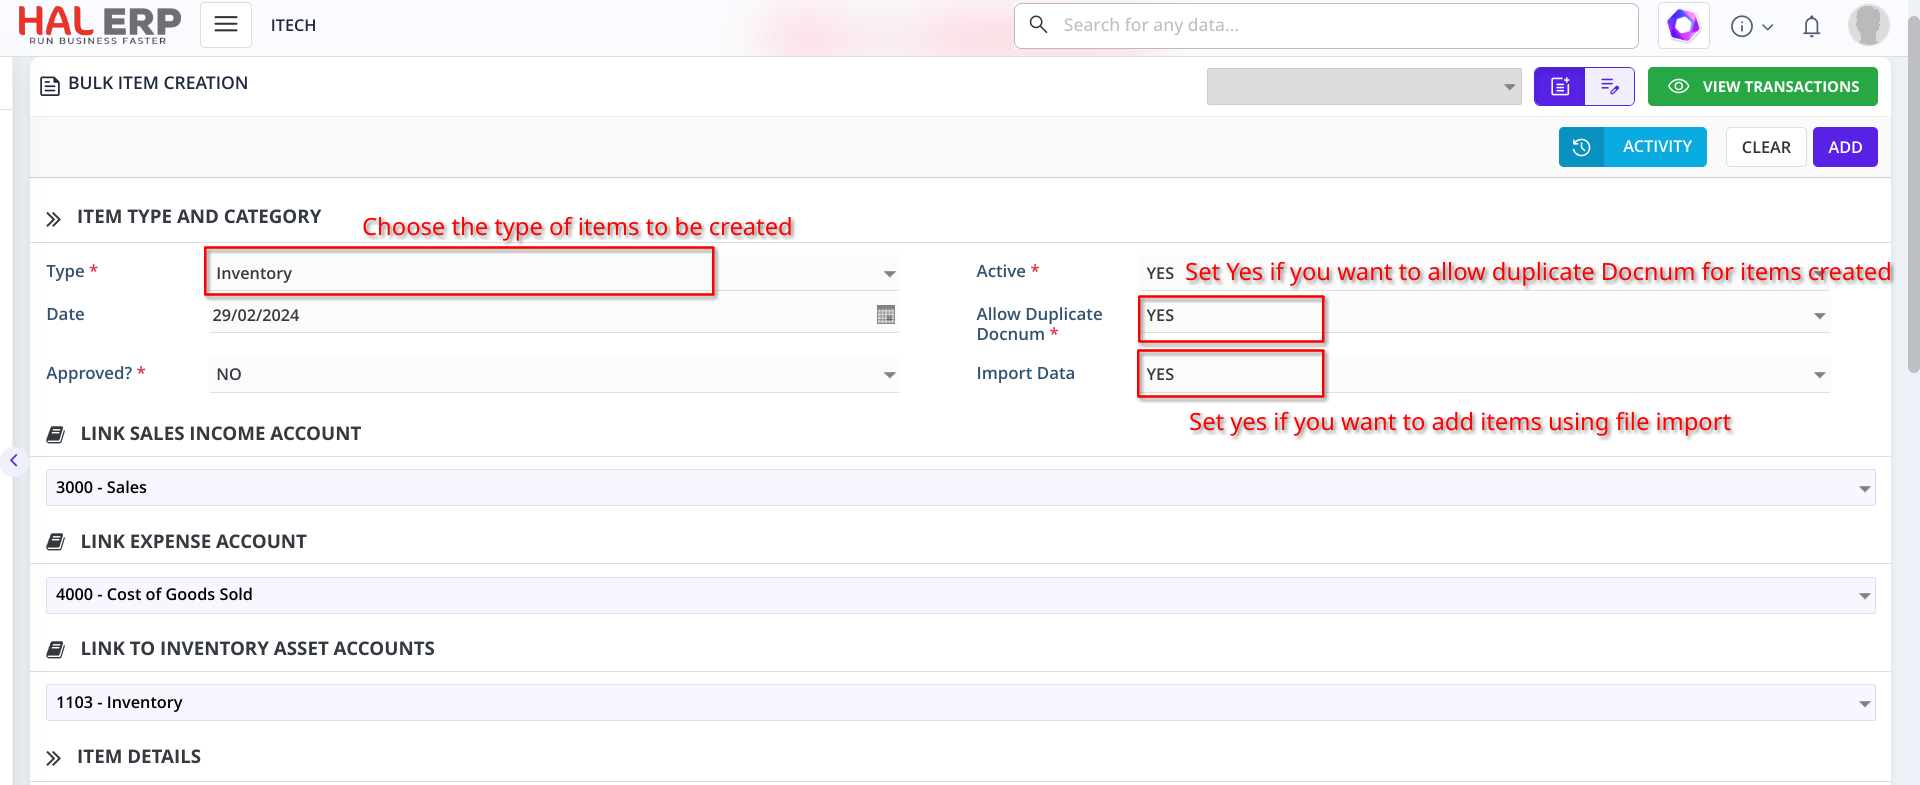
2. Creating items in bulk using file import
Set the import data field as 'YES', then download the sample sheet, add item details for the items to be created, and upload the sheet.

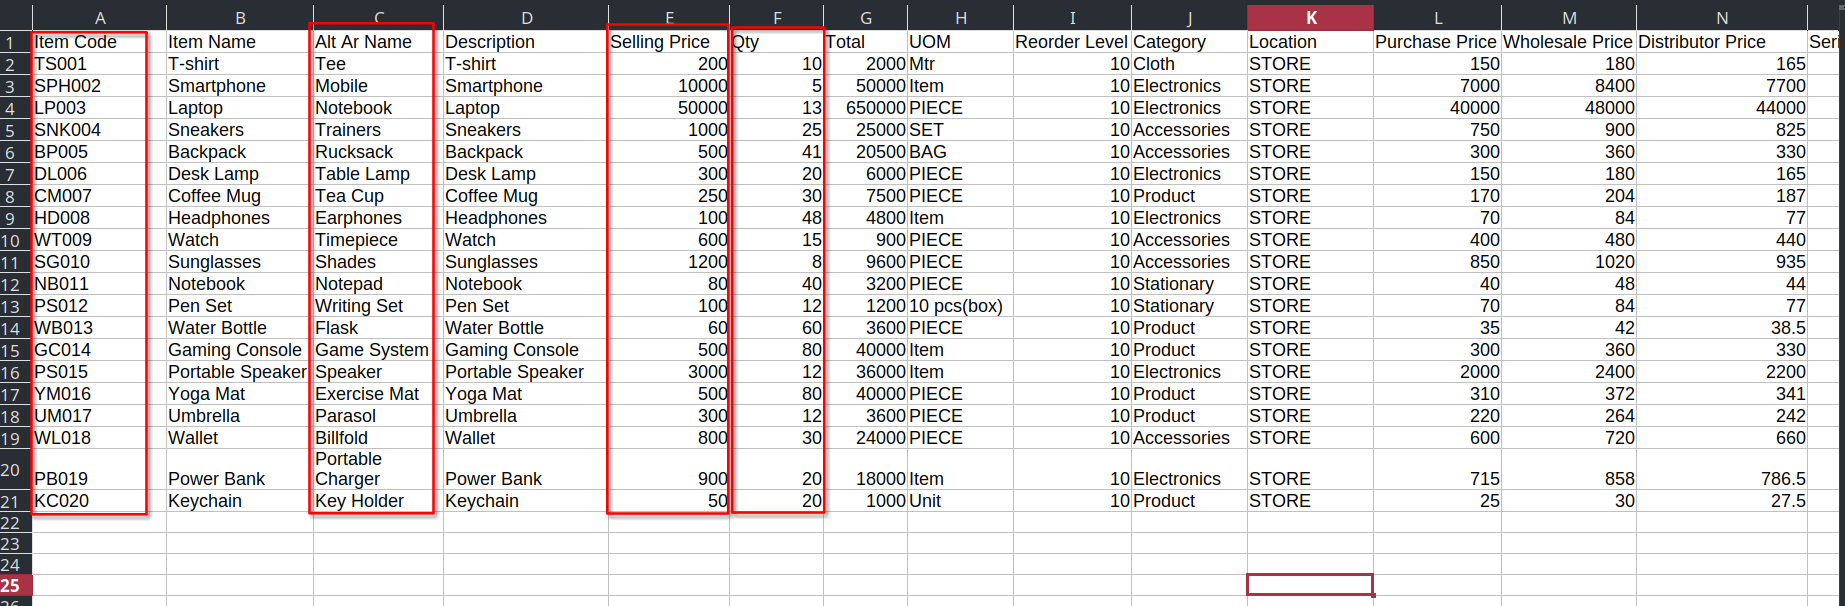
Add item details to the downloaded sample sheet.
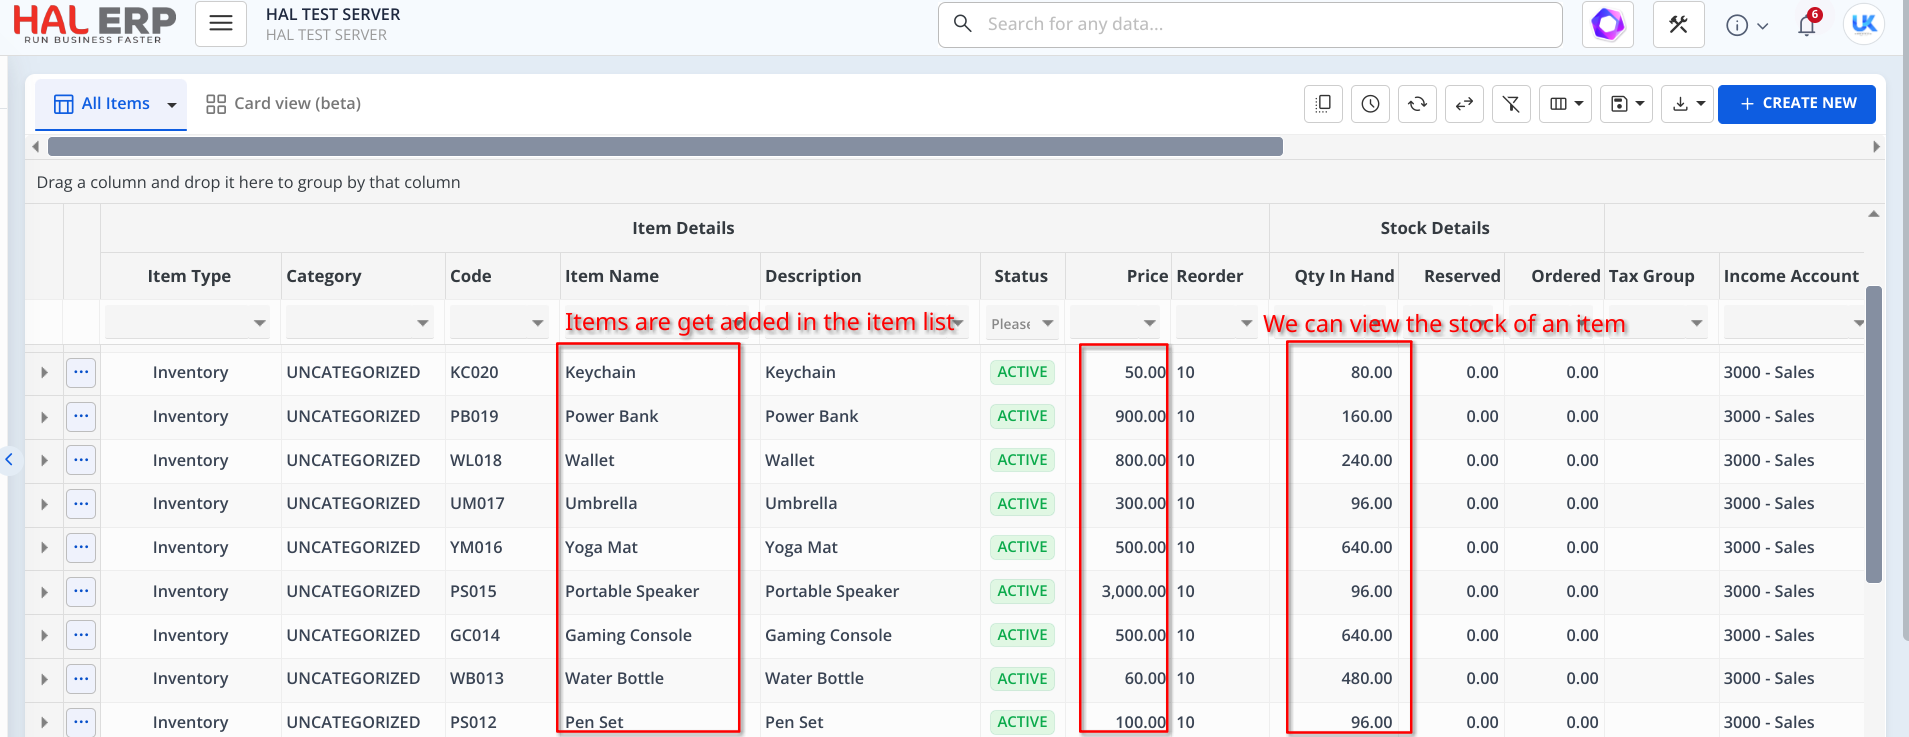
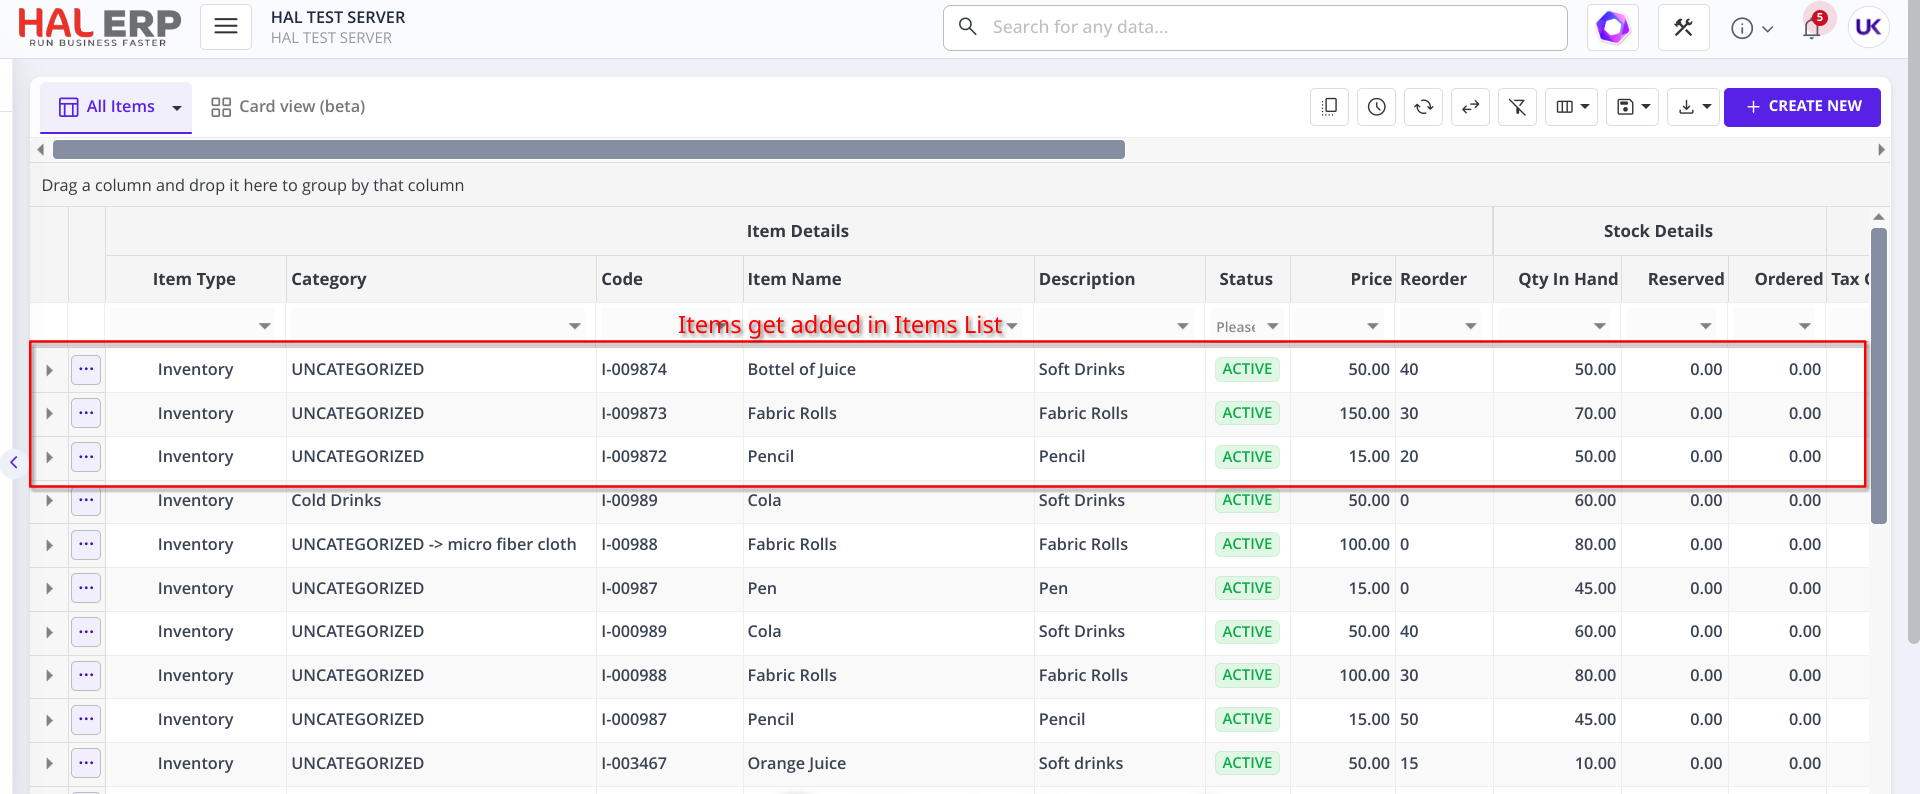
Click 'ADD' to add items in bulk. Items will be added to the Item List.

3. Creating items in bulk using grid
Click the ' + ' icon in the grid to add a new row. Once the new row is added, select it and enter the number of rows we want to duplicate in the text box.
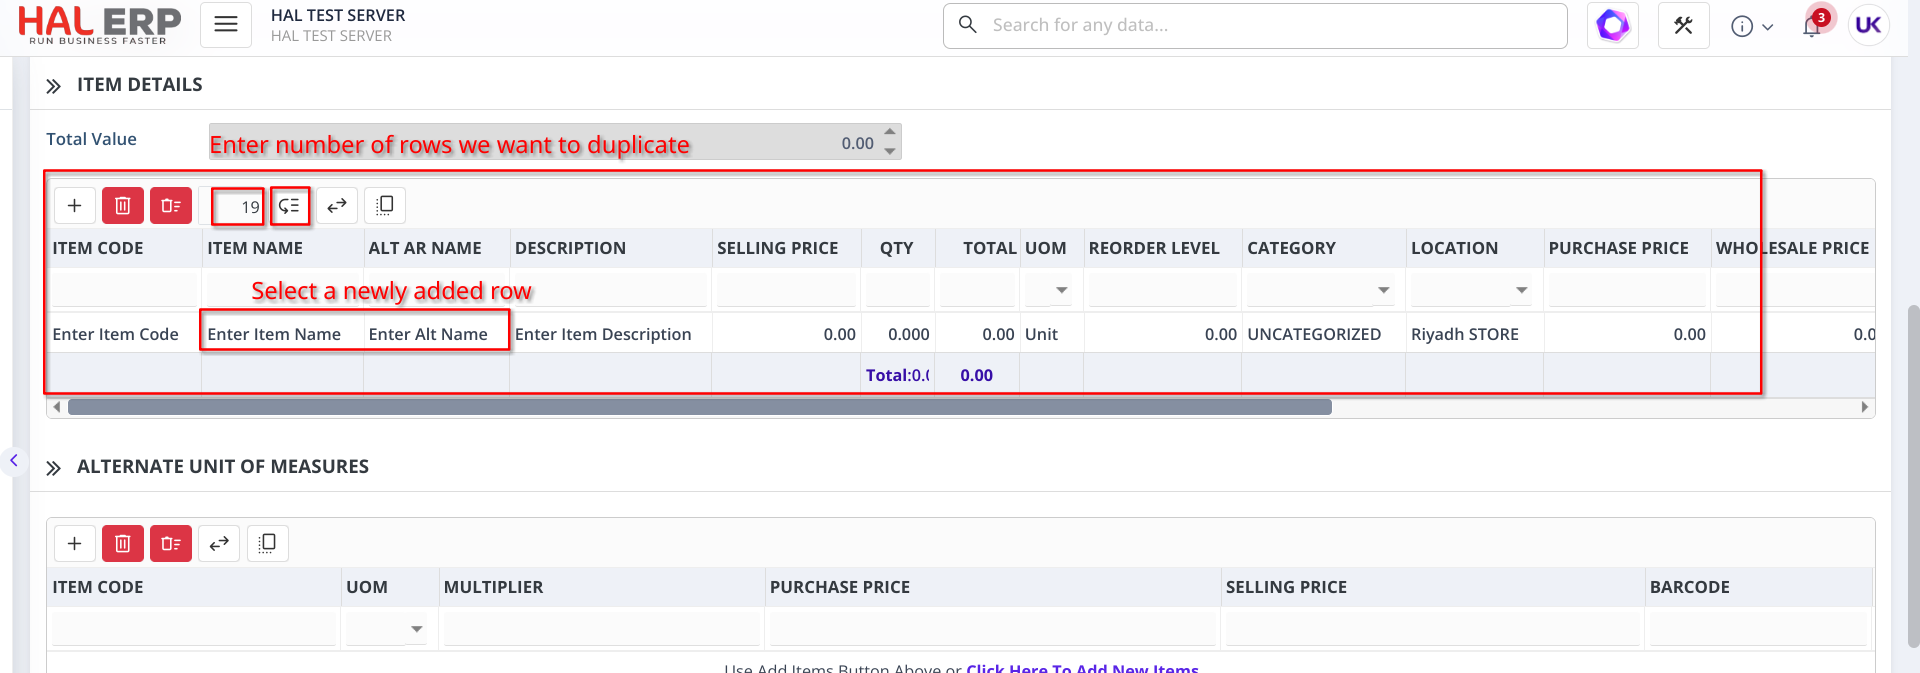
Once the number entered in the textbox, click the icon next to the textbox and the number of rows entered will get added in the grid.
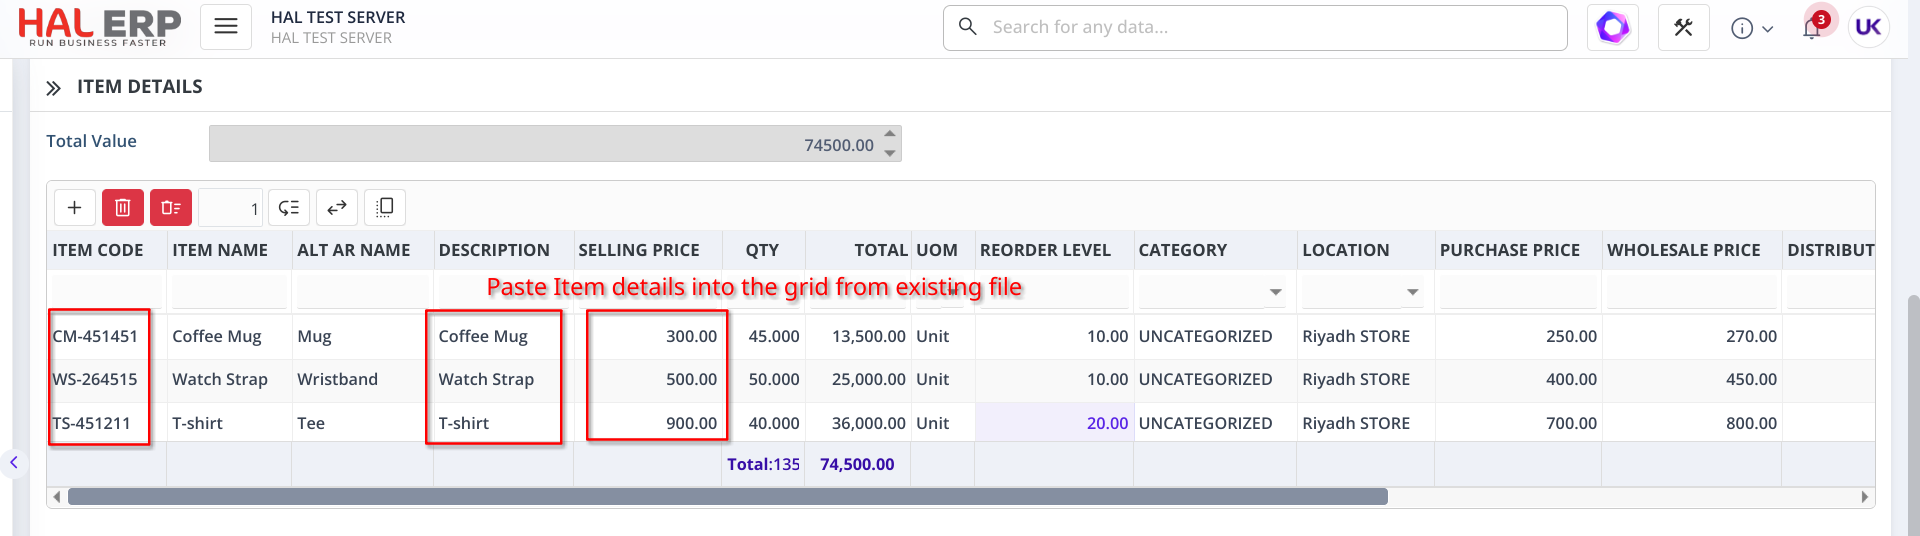
Then add the Item details either by copying their details from the XL/CSV file and pasting them here in column wise or by manually entering here.
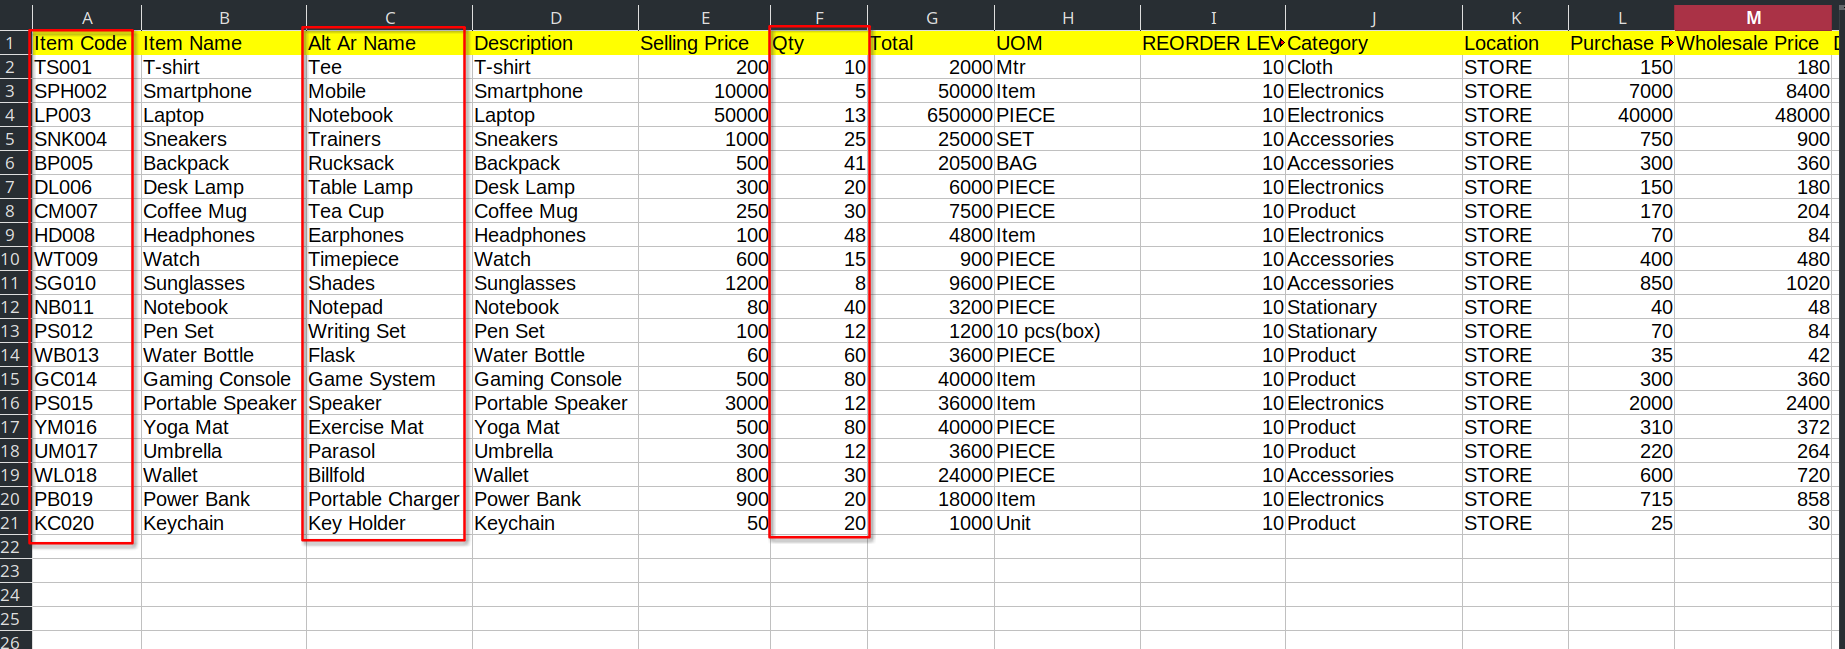

Once the details are pasted in the grid from the existing file, click on "ADD" to create the items. You can view the stock of an item in the item list screen.
Note :
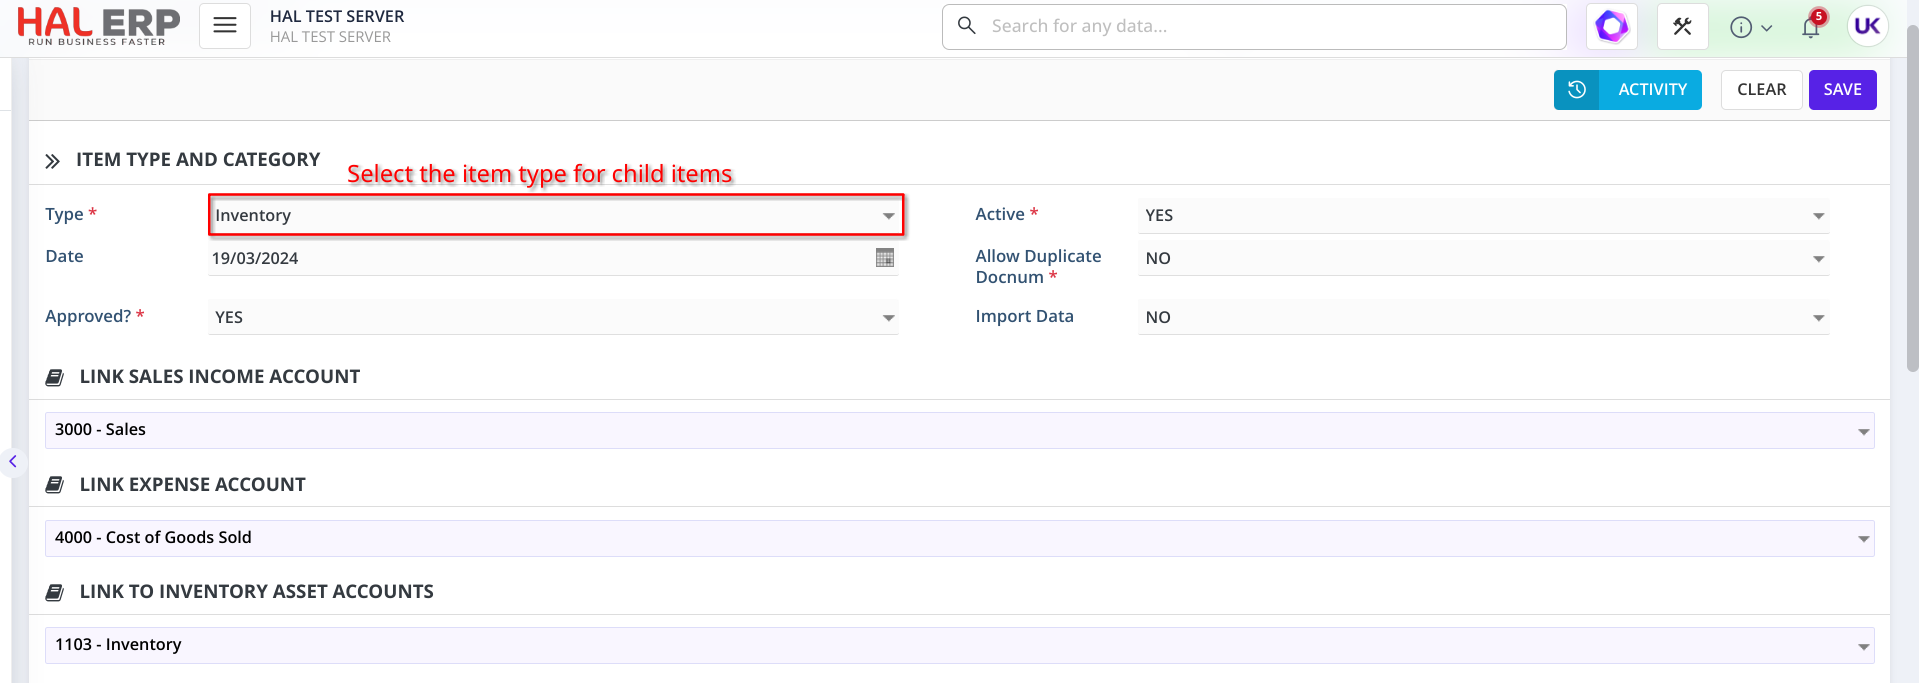
1. If items belongs to different categories and those categories are linked to different ledgers, then ADD single category at a time in one transaction.
2. Verify if the ledgers are correctly mapped as the same will impact during.
4. Creating items in bulk with UOM
UOM stands for "Unit of Measure". It refers to the standard unit used to quantify a particular item or commodity.
Copy Items detail from Existing file and paste them in the Item Details grid in column wise.

4.1 Alternate unit of measure
Alternate units of measure (UOM) refers to additional units in which an item's quantity can be measured apart from its primary unit of measure.
Copy the Alternate Units of Measurement (UOM) for the items to be created and paste them into the Alternate UOM grid.


Once the details are pasted into the grid from the existing file, click on "ADD" to create the items. The items will be added to the Item List.
4.2 UOM Flexibility in purchase orders
When creating a purchase order for the item with alternate UOM, we have the flexibility to choose the item with various units of measurement (UOM).
Double-clicking the unit column in purchase order screen displays the base unit along with its alternate units of measurement for the item.
The price of the item varies depending on the selected unit

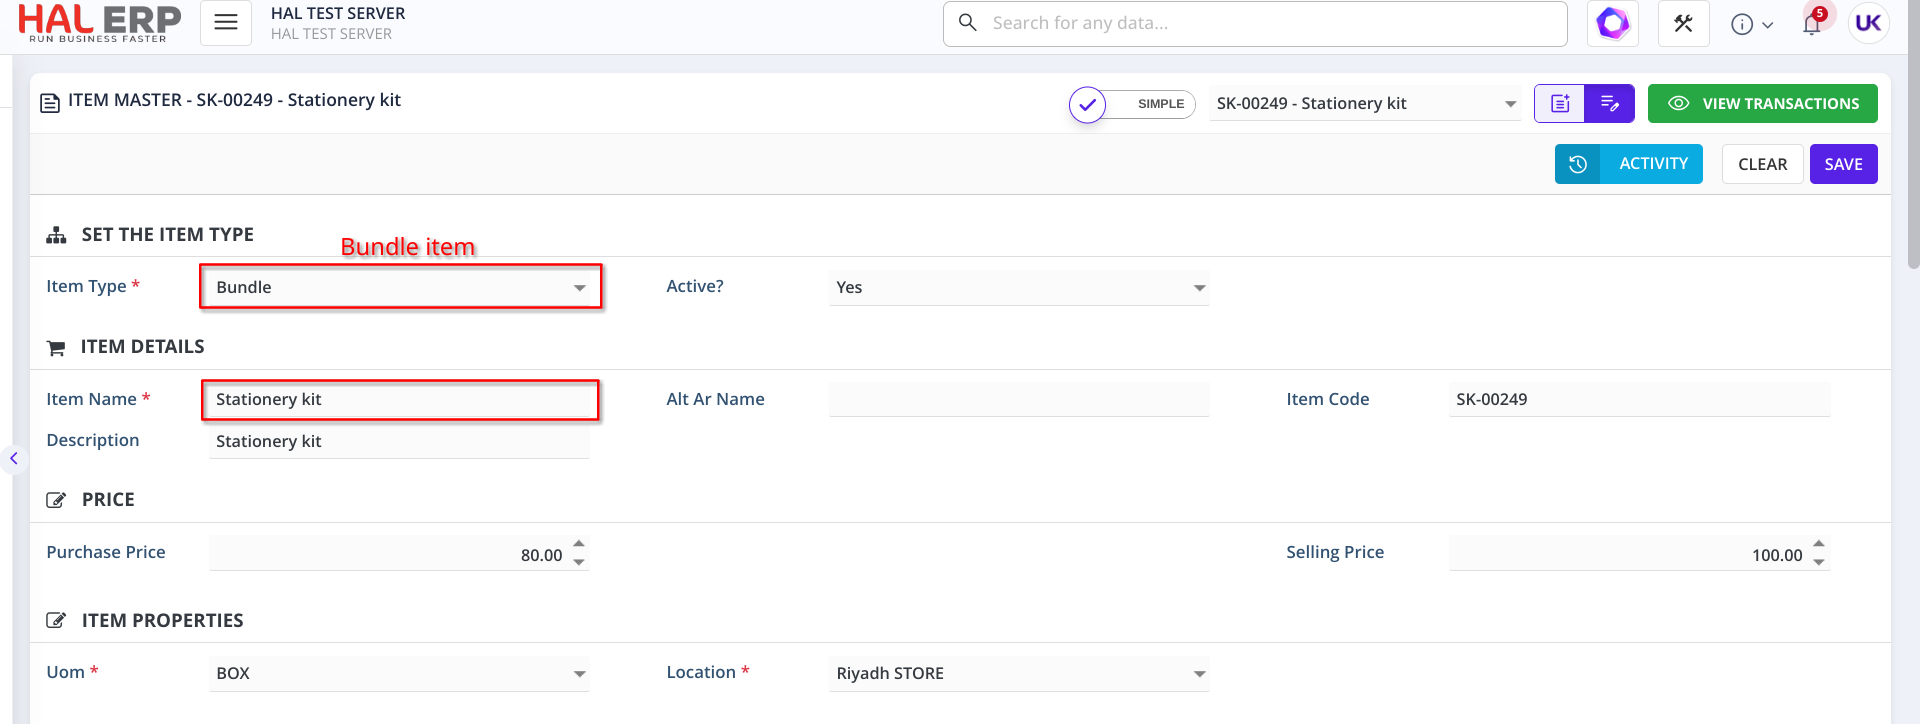
5. Creating bundle items
Bundle items are composed of multiple constituent items, known as child items or sub items.
Bundle items consist of one or more child items associated with each bundle. These child items can be regular inventory or non-inventory items.
Before proceeding to create bundle items, make sure that you have already created other inventory or non-inventory items, which will serve as the child items.
Copy the details of items from the existing file and paste them into the grid in column-wise.


Once the details are pasted into the grid, click on "ADD" to create the items. The items will be added to the Item List.
5.1 To add items to a bundle
Select item type as "Bundle".
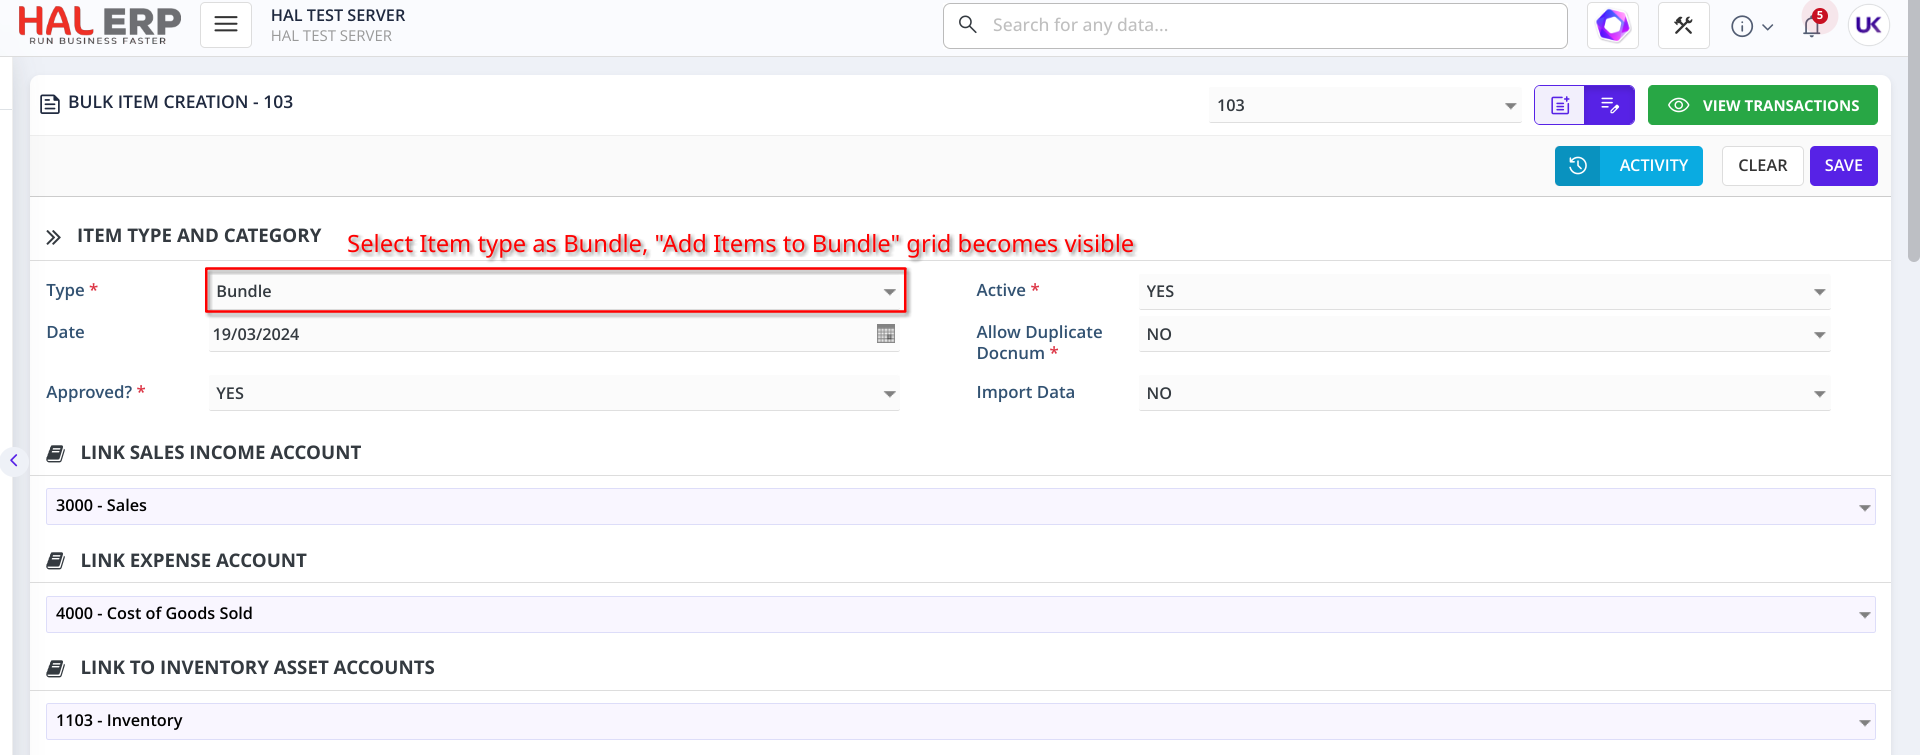
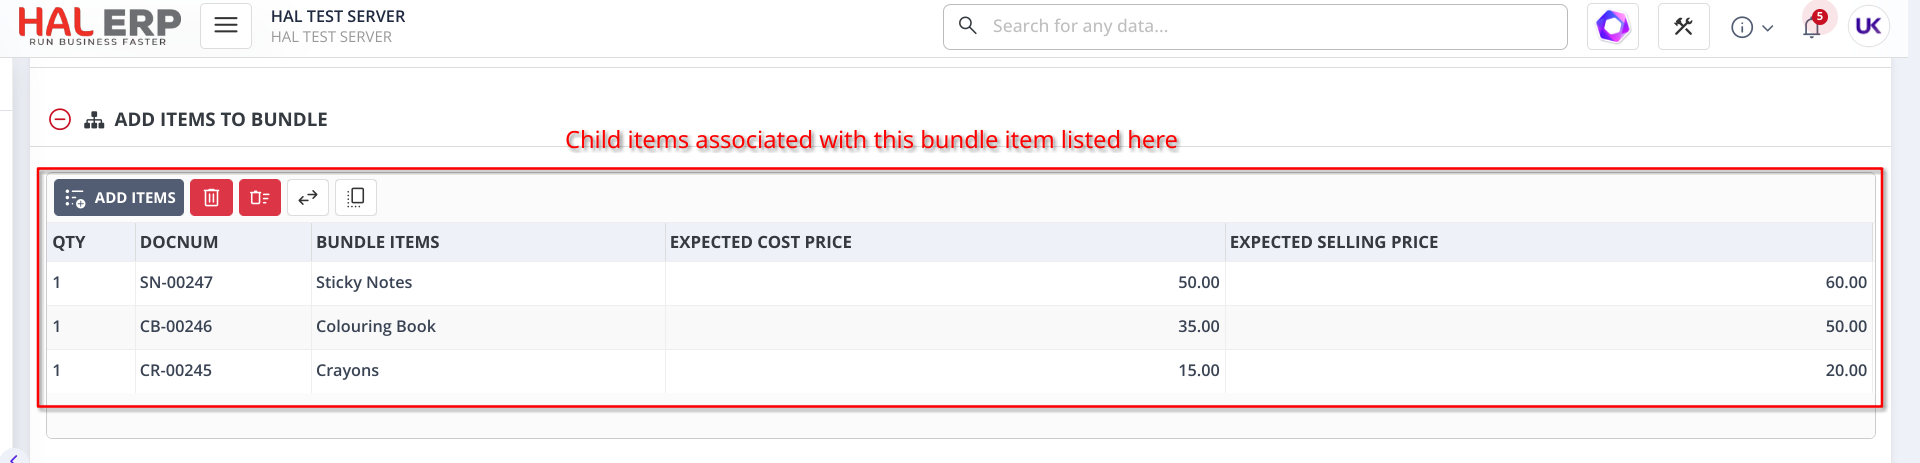
Once the item type is selected as Bundle, the "Add Items to Bundle" grid becomes visible.
Enter/Paste bundle item details in the grid.

Once the details for the bundle item are entered, proceed to add child items to the bundle.

Copy the item details from the existing file and paste them in "Add Items To Bundle" grid

Once the details are entered, click on "ADD" to create the bundle item.The bundle item get added to the item list.

When double-clicking on the bundle item displayed in the item list screen, it switches to edit mode, allowing us to view the child items associated with the bundle item
6. Creating items in bulk with variants
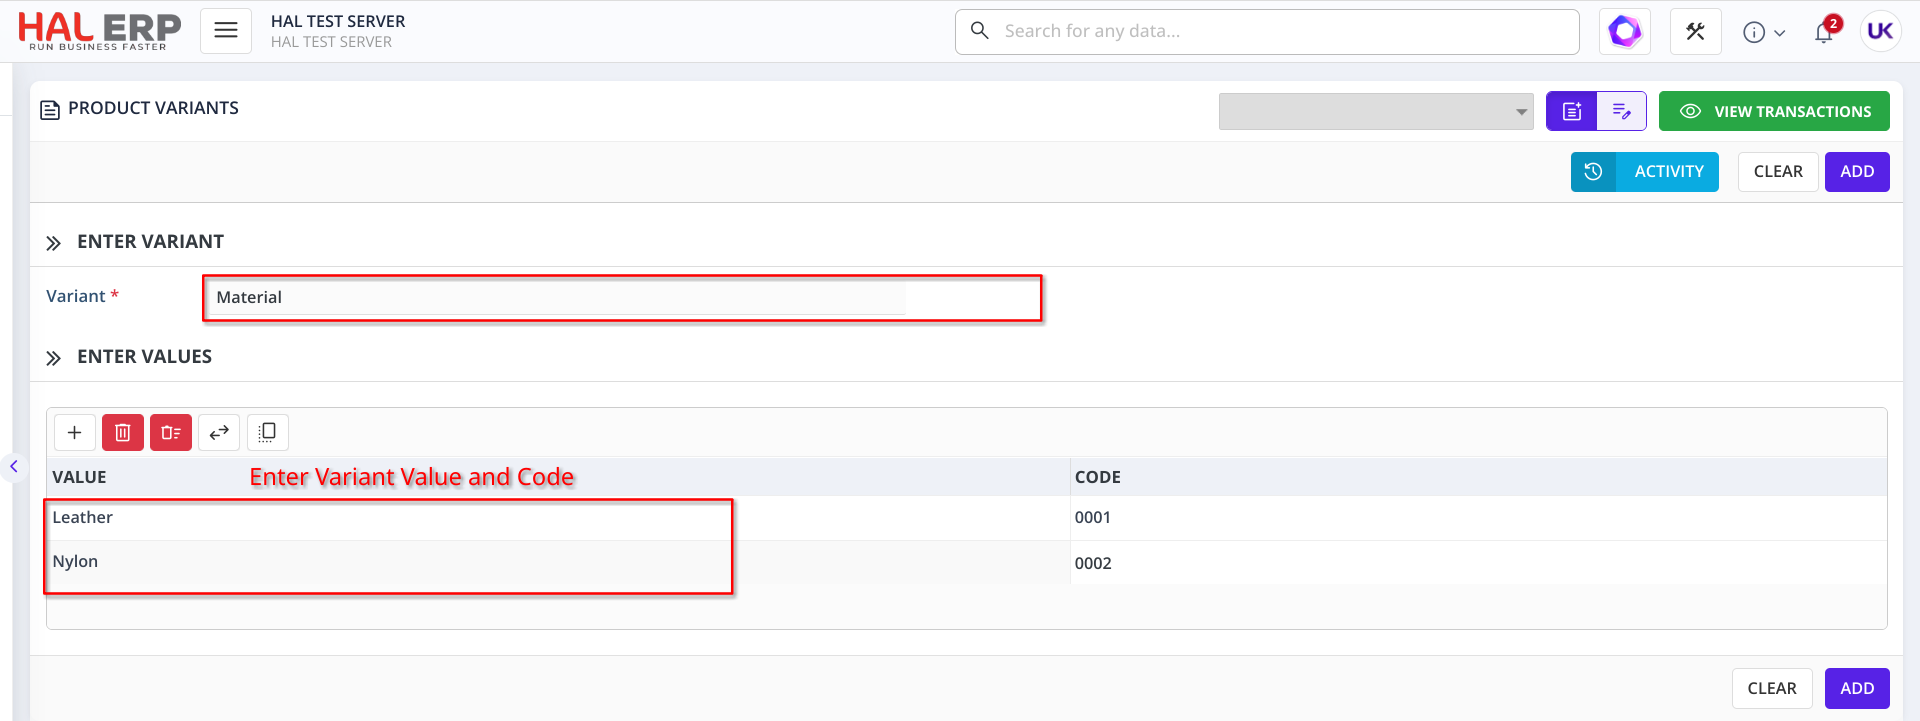
Variants refer to the different attributes or options that a product can have, which can affect its appearance, features, or specifications.
When creating items with variants, you're essentially defining different versions of the same product based on these attributes.
6.1 To create Variants
Go to Inventory>> Product Variants>> Create New
6.2 To create items with Variants
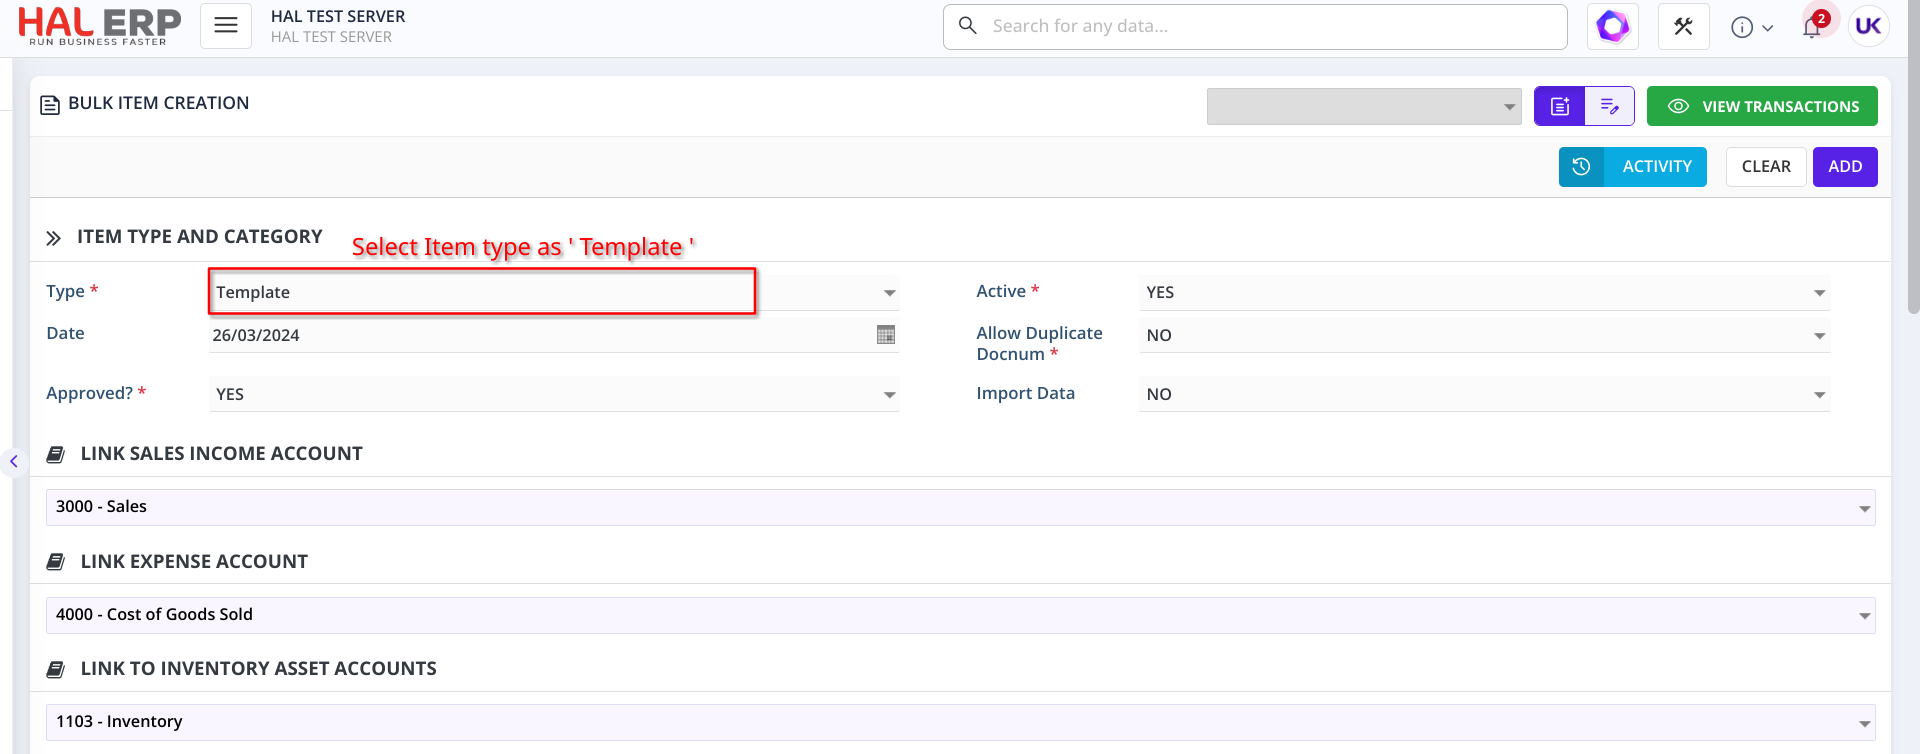
Select Item type as ' Template '
Copy the item details from the existing file and paste them in "Item Details" grid
Once the item type is selected as ' Template ', the "ENTER PRODUCT VARIANT DETAILS" grid becomes visible. Copy item variants details from existing file and paste them into the grid.


Once the details are entered, click "ADD" to create the items with variants. The items with variants will then be added to the item list.
7. Category-Based Ledger Mapping for Bulk Item Creation
When adding multiple items at once and If the items belong to different categories and if each category belong to different ledger accounts.
You can link the ledgers individually for each category in the item categories screen. When items are added to the grid, each item will be associated with the ledger linked to its category instead of the same ledger account for all items in the grid.
This ensures more accurate accounting as each item is assigned to its appropriate ledger account based on its category.
7.1 Mapping Ledger Accounts for Item Categories
Go to Inventory>> Item Categories>> Create New

Once the item category is linked with the ledger accounts, click " save ".
In bulk item creation screen , paste item details with items belong to different item categories in the grid.

Once the details are entered click " ADD " . The items will be added with their corresponding ledger accounts.

8. Bulk Item Creation: Edit Mode
To edit a large number of items in Bulk Item Creation, you click on "Create New"

Ensure that Category Name is "Inventory" and Import Data is "YES"

Scroll down to the "Drop Files to Upload" section and set Task to "Edit"
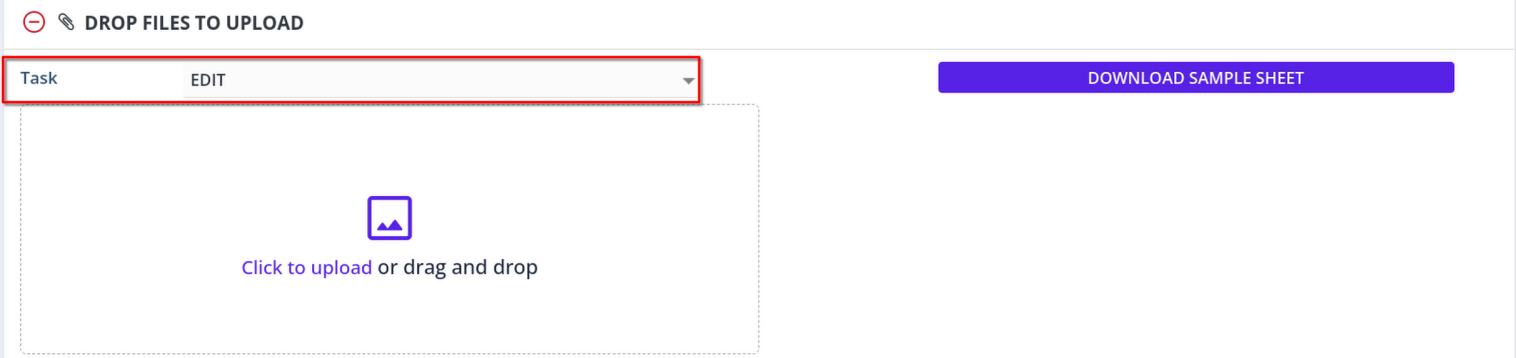
Now download the template and enter the modified data of the Items that you want to be edited. Do not add quantity values in the template as it will not work. This edit mode can be used to edit Names, Prices but not Quantities.
Once Uploaded, click on "Add" and it will automatically be Approved and the data will be amended in the Item List
Was this article helpful?
That’s Great!
Thank you for your feedback
Sorry! We couldn't be helpful
Thank you for your feedback
Feedback sent
We appreciate your effort and will try to fix the article